Ingredients for Homemade No Bake Twix Cheesecake
To create this delightful homemade no-bake Twix cheesecake, you will need a few simple ingredients. Each component plays a vital role in achieving that rich, creamy texture and delicious flavor. Here’s what you’ll need:
- 2 cups graham cracker crumbs
- 1/2 cup melted butter
- 1 cup chocolate chips
- 8 oz cream cheese, softened
- 1/2 cup granulated sugar
- 1 tsp vanilla extract
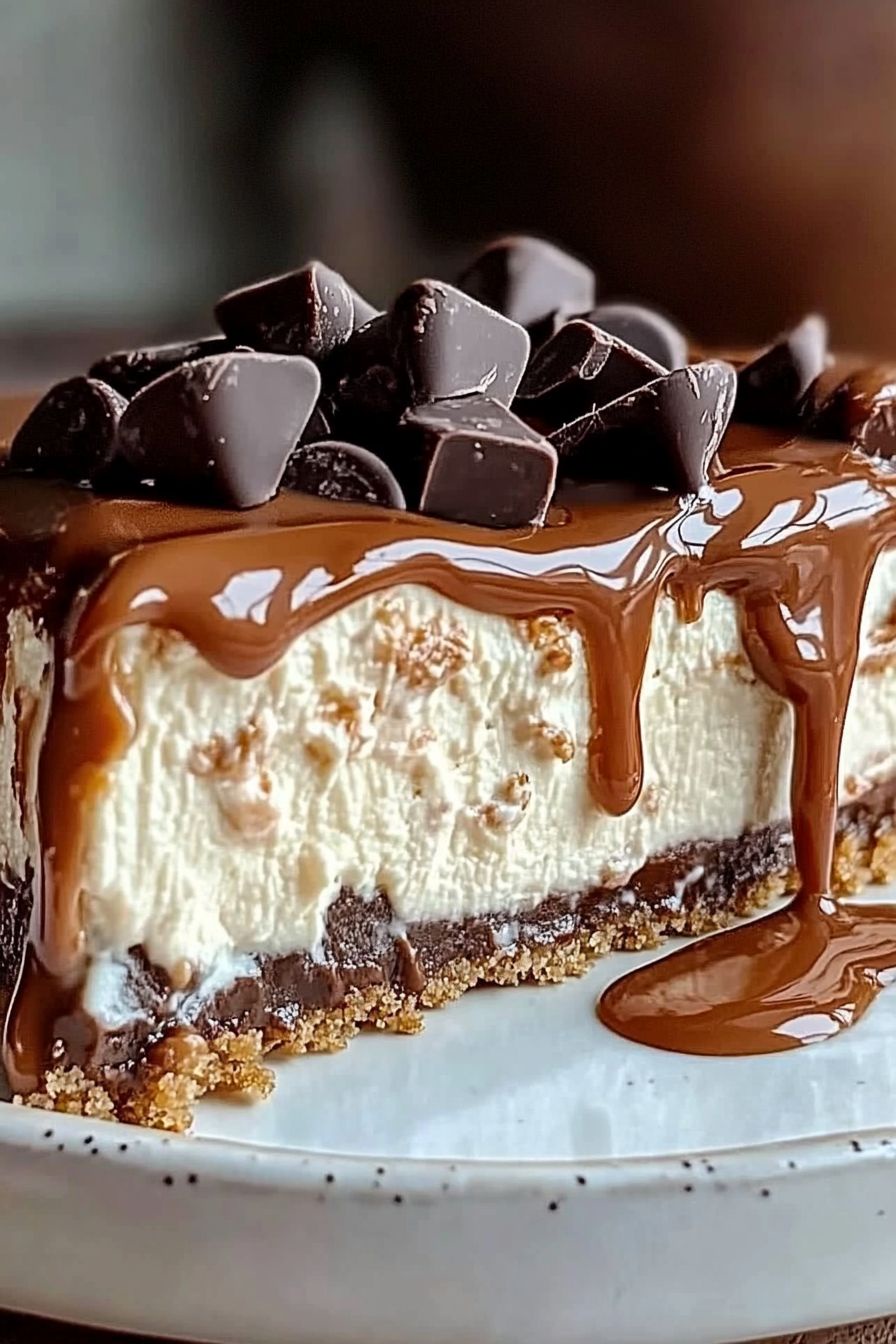
These ingredients come together to create a dessert that is not only easy to make but also incredibly satisfying. The graham cracker crumbs form a buttery crust that perfectly complements the creamy cheesecake filling. Meanwhile, the chocolate topping adds a rich finish that makes this dessert irresistible.
Step-by-Step Preparation of Homemade No Bake Twix Cheesecake
Step 1: Prepare the Graham Cracker Crust
Start by mixing the graham cracker crumbs with melted butter in a bowl. This mixture should be crumbly yet hold together when pressed. Once combined, press it firmly into the bottom of a springform pan. This will create a solid base for your cheesecake.
Step 2: Create the Creamy Cheesecake Filling
In a separate bowl, beat the softened cream cheese, sugar, and vanilla extract until smooth. This step is crucial for achieving a creamy texture. Once smooth, spread the cheesecake filling evenly over the prepared crust. Make sure to cover the crust completely for a balanced flavor in every bite.
Step 3: Add the Decadent Chocolate Topping
Next, melt the chocolate chips in a microwave or over a double boiler. Once melted, pour the chocolate over the cheesecake layer. Use a spatula to spread it evenly. This chocolate layer adds a rich, indulgent touch that makes the cheesecake truly special.
Step 4: Chill and Set the Cheesecake
Finally, place the cheesecake in the refrigerator. Allow it to chill for at least 4 hours, or until it is set. This chilling time is essential for the flavors to meld and the cheesecake to firm up. Once set, your homemade no-bake Twix cheesecake is ready to be enjoyed!
Variations of Homemade No Bake Twix Cheesecake
While the classic homemade no-bake Twix cheesecake is delicious on its own, there are many fun variations you can try. These tweaks can add new flavors and textures, making your dessert even more exciting. Here are some ideas to inspire your creativity:
Adding Different Toppings
One of the easiest ways to change up your cheesecake is by adding different toppings. You can try:
- Caramel Sauce: Drizzle some caramel sauce over the chocolate topping for a sweet twist.
- Chopped Nuts: Sprinkle crushed peanuts or almonds on top for a crunchy texture.
- Whipped Cream: Add a dollop of whipped cream for a light and airy finish.
- Chocolate Shavings: Garnish with chocolate shavings for an elegant touch.
These toppings not only enhance the flavor but also make your cheesecake visually appealing. Feel free to mix and match to find your favorite combination!
Alternative Crust Options
If you want to switch things up, consider using different crust options. Here are a few ideas:
- Oreo Crust: Replace graham cracker crumbs with crushed Oreos for a chocolatey base.
- Almond Flour Crust: For a gluten-free option, use almond flour mixed with melted butter.
- Peanut Butter Crust: Add some peanut butter to your graham cracker crust for a nutty flavor.
These alternative crusts can add a unique twist to your homemade no-bake Twix cheesecake. Experimenting with different flavors can lead to delightful surprises!
Step-by-Step Preparation of Homemade No Bake Twix Cheesecake
Step 1: Prepare the Graham Cracker Crust
To kick off your homemade no-bake Twix cheesecake, start with the crust. In a medium bowl, combine the graham cracker crumbs and melted butter. Mix them well until the crumbs are fully coated. The mixture should feel crumbly but hold together when pressed. Next, take a springform pan and firmly press the crumb mixture into the bottom. Make sure it’s even and compact. This crust will provide a delicious base for your cheesecake.
Step 2: Create the Creamy Cheesecake Filling
Now, let’s move on to the cheesecake filling. In a large mixing bowl, beat the softened cream cheese until it’s smooth and creamy. Gradually add the granulated sugar and vanilla extract. Continue mixing until everything is well combined and there are no lumps. This step is key for a velvety texture. Once ready, gently spread the cheesecake filling over the prepared crust. Use a spatula to ensure an even layer, covering the crust completely.
Step 3: Add the Decadent Chocolate Topping
Next, it’s time to add that rich chocolate topping. Melt the chocolate chips in a microwave-safe bowl or over a double boiler. If using a microwave, heat in short bursts, stirring in between to avoid burning. Once melted, pour the chocolate over the cheesecake layer. Use a spatula to spread it evenly across the top. This chocolate layer not only adds flavor but also gives your cheesecake a beautiful finish.
Step 4: Chill and Set the Cheesecake
Finally, it’s time to let your cheesecake set. Carefully place the cheesecake in the refrigerator. Allow it to chill for at least 4 hours, or until it’s firm. This chilling time is crucial for the flavors to meld together and for the cheesecake to achieve the right consistency. Once set, your homemade no-bake Twix cheesecake is ready to slice and serve. Enjoy the delightful layers of flavor!
Variations of Homemade No Bake Twix Cheesecake
While the classic homemade no-bake Twix cheesecake is delicious on its own, there are many fun variations you can try. These tweaks can add new flavors and textures, making your dessert even more exciting. Here are some ideas to inspire your creativity:
Adding Different Toppings
One of the easiest ways to change up your cheesecake is by adding different toppings. You can try:
- Caramel Sauce: Drizzle some caramel sauce over the chocolate topping for a sweet twist. The combination of chocolate and caramel is simply irresistible!
- Chopped Nuts: Sprinkle crushed peanuts or almonds on top for a crunchy texture. This adds a delightful contrast to the creamy cheesecake.
- Whipped Cream: Add a dollop of whipped cream for a light and airy finish. It makes each bite feel extra special.
- Chocolate Shavings: Garnish with chocolate shavings for an elegant touch. This not only looks beautiful but also enhances the chocolate flavor.
These toppings not only enhance the flavor but also make your cheesecake visually appealing. Feel free to mix and match to find your favorite combination!
Alternative Crust Options
If you want to switch things up, consider using different crust options. Here are a few ideas:
- Oreo Crust: Replace graham cracker crumbs with crushed Oreos for a chocolatey base. This adds a rich flavor that pairs perfectly with the cheesecake.
- Almond Flour Crust: For a gluten-free option, use almond flour mixed with melted butter. This crust is nutty and delicious!
- Peanut Butter Crust: Add some peanut butter to your graham cracker crust for a nutty flavor. It complements the chocolate beautifully.
These alternative crusts can add a unique twist to your homemade no-bake Twix cheesecake. Experimenting with different flavors can lead to delightful surprises!
Cooking Note for Homemade No Bake Twix Cheesecake
When making your homemade no-bake Twix cheesecake, a few cooking notes can help ensure your dessert turns out perfectly. These tips will guide you through the process and enhance your overall experience.
First, always use room temperature cream cheese. This is crucial for achieving a smooth and creamy filling. Cold cream cheese can lead to lumps, which you want to avoid. To bring it to room temperature, simply leave it out for about 30 minutes before you start mixing.
Next, be mindful of the melting process for your chocolate chips. If you choose to use a microwave, heat them in short intervals of 15-20 seconds. Stir in between to prevent burning. Alternatively, using a double boiler allows for gentle melting, which can help maintain the chocolate’s glossy finish.
Additionally, when pressing the graham cracker crust into the pan, use the bottom of a measuring cup or a flat object. This will help create an even and compact crust, ensuring it holds together well once set.
Lastly, patience is key! Allowing the cheesecake to chill for the full 4 hours is essential. This time lets the flavors meld beautifully and ensures the cheesecake sets properly. Rushing this step can lead to a runny texture, which is not what you want.
By following these cooking notes, you’ll set yourself up for success. Your homemade no-bake Twix cheesecake will be a delightful treat that everyone will love!
Serving Suggestions for Homemade No Bake Twix Cheesecake
Once your homemade no-bake Twix cheesecake is ready, it’s time to think about how to serve it. While the cheesecake is delicious on its own, pairing it with other elements can elevate the experience. Here are some delightful serving suggestions to consider:
Pairing with Fresh Fruits
Fresh fruits can add a burst of flavor and color to your cheesecake. Consider serving slices of your cheesecake with:
- Strawberries: Their sweetness complements the rich chocolate and creamy filling.
- Raspberries: The tartness of raspberries provides a nice contrast to the sweetness of the cheesecake.
- Bananas: Sliced bananas add a creamy texture that pairs well with the cheesecake.
- Blueberries: These little gems add a pop of color and a hint of sweetness.
Not only do these fruits enhance the flavor, but they also make your dessert look more appealing. You can arrange them on the plate or even top the cheesecake with a few pieces before serving.
Serving with Whipped Cream
Whipped cream is a classic topping that can make your cheesecake feel extra special. Here’s how to incorporate it:
- Dollop on Top: Add a generous dollop of whipped cream on each slice for a light and airy touch.
- Flavored Whipped Cream: Consider adding a hint of vanilla or cocoa powder to your whipped cream for added flavor.
- Chocolate Drizzle: Drizzle some melted chocolate over the whipped cream for a decadent finish.
Whipped cream not only enhances the visual appeal but also adds a creamy texture that balances the richness of the cheesecake. It’s a simple yet effective way to elevate your dessert.
With these serving suggestions, your homemade no-bake Twix cheesecake will be a hit at any gathering. Enjoy the delightful combination of flavors and textures!
Tips for Perfecting Your Homemade No Bake Twix Cheesecake
Ensuring the Right Consistency
Getting the right consistency for your homemade no-bake Twix cheesecake is essential for a delightful dessert. Here are some tips to help you achieve that perfect texture:
- Use Room Temperature Ingredients: Always start with room temperature cream cheese. This helps it blend smoothly with the sugar and vanilla, preventing lumps.
- Beat Well: When mixing the cream cheese, sugar, and vanilla, beat them until the mixture is completely smooth. This ensures a creamy filling that’s easy to spread.
- Chill Properly: Allow the cheesecake to chill for the full 4 hours. This time is crucial for the filling to set properly. If you rush this step, the cheesecake may not hold its shape.
- Check for Firmness: Before serving, gently shake the pan. If the cheesecake jiggles slightly in the center, it’s ready. If it’s too wobbly, give it more time in the fridge.
By following these tips, you’ll ensure that your cheesecake has a smooth, creamy texture that everyone will love. A well-set cheesecake is the key to a successful dessert!
Storing Leftovers Properly
If you happen to have leftovers of your homemade no-bake Twix cheesecake, proper storage is important to maintain its freshness. Here’s how to store it:
- Cover Tightly: Use plastic wrap or aluminum foil to cover the cheesecake tightly. This prevents it from absorbing any odors from the fridge.
- Refrigerate: Store the cheesecake in the refrigerator. It can last for up to 5 days when stored properly.
- Freeze for Longer Storage: If you want to keep it longer, you can freeze the cheesecake. Wrap it tightly in plastic wrap and then in aluminum foil. It can last for up to 2 months in the freezer.
- Thawing: When ready to enjoy, thaw the cheesecake in the refrigerator overnight. This helps it regain its creamy texture.
By storing your cheesecake correctly, you can enjoy its deliciousness for days to come. Whether you’re savoring it fresh or frozen, it’s sure to be a treat!
Breakdown of Time for Homemade No Bake Twix Cheesecake
Prep Time
The prep time for your homemade no-bake Twix cheesecake is quite short. You’ll need about 15 minutes to gather your ingredients and prepare the crust and filling. This quick preparation makes it an ideal dessert for those who want something delicious without spending hours in the kitchen.
Cooking Time
Interestingly, there is no actual cooking time involved in this recipe. Since it’s a no-bake cheesecake, you won’t need to turn on the oven at all. Instead, the only time required is for melting the chocolate, which takes just a few minutes. This makes the process even easier!
Total Time
While the preparation is quick, the total time for your homemade no-bake Twix cheesecake includes chilling. After you’ve prepared the cheesecake, it needs to chill in the refrigerator for at least 4 hours. This chilling time is essential for the cheesecake to set properly and for the flavors to meld together. So, in total, you’re looking at about 4 hours and 15 minutes from start to finish, with most of that time being hands-off while it chills.
In summary, you can whip up this delightful dessert in just 15 minutes, but be sure to plan for the chilling time. The wait will be worth it when you finally slice into your creamy, chocolatey cheesecake!
Nutritional Information for Homemade No Bake Twix Cheesecake
Calories and Macronutrients
Understanding the nutritional content of your homemade no-bake Twix cheesecake can help you enjoy it even more. Each slice of this delightful dessert contains approximately 300 calories. Here’s a breakdown of the macronutrients per serving:
- Calories: 300
- Fat: 20g
- Carbohydrates: 28g
- Protein: 4g
These values can vary slightly based on the specific brands of ingredients you use. However, this cheesecake remains a rich and satisfying treat. The combination of cream cheese, chocolate, and graham crackers contributes to its delicious flavor and creamy texture.
Healthier Ingredient Substitutions
If you’re looking to make your homemade no-bake Twix cheesecake a bit healthier, consider these substitutions:
- Reduced-Fat Cream Cheese: Swap regular cream cheese for reduced-fat cream cheese. This can lower the overall fat content while still maintaining a creamy texture.
- Greek Yogurt: For a lighter filling, mix in some plain Greek yogurt. It adds protein and a tangy flavor, making the cheesecake even more nutritious.
- Honey or Maple Syrup: Instead of granulated sugar, use honey or maple syrup as a natural sweetener. This can add a unique flavor and reduce refined sugar intake.
- Whole Wheat Graham Crackers: Opt for whole wheat graham crackers instead of regular ones. This increases the fiber content and makes the crust a bit healthier.
By making these simple substitutions, you can enjoy your homemade no-bake Twix cheesecake while being mindful of your health. It’s all about balance, and with these adjustments, you can indulge without the guilt!
FAQs about Homemade No Bake Twix Cheesecake
Can I make this cheesecake ahead of time?
Absolutely! One of the best things about homemade no-bake Twix cheesecake is that it can be made ahead of time. In fact, making it a day in advance can enhance the flavors as they meld together. Just prepare the cheesecake, chill it in the refrigerator, and it will be ready to serve when you need it. This makes it a perfect dessert for parties or gatherings, allowing you to enjoy the event without the stress of last-minute preparations.
How do I know when the cheesecake is set?
To check if your cheesecake is set, gently shake the pan. If the center jiggles slightly but the edges are firm, it’s ready. The cheesecake should not be overly wobbly. If it still looks too soft, give it more time in the refrigerator. Remember, patience is key! Allowing it to chill for the full 4 hours ensures that it reaches the right consistency for slicing and serving.
Can I freeze the homemade no bake Twix cheesecake?
Yes, you can freeze your homemade no-bake Twix cheesecake! To do this, wrap it tightly in plastic wrap and then in aluminum foil. This will help prevent freezer burn and keep it fresh. It can be stored in the freezer for up to 2 months. When you’re ready to enjoy it, simply thaw it in the refrigerator overnight. This way, you can savor your delicious cheesecake even after some time has passed!
Conclusion on Homemade No Bake Twix Cheesecake
Final Thoughts on This Delicious Dessert
In conclusion, the homemade no-bake Twix cheesecake is a delightful treat that combines simplicity with indulgence. Its buttery graham cracker crust, creamy filling, and rich chocolate topping create a dessert that is sure to impress anyone who takes a bite. Whether you’re hosting a gathering or simply treating yourself, this cheesecake is a fantastic choice.
Not only is it easy to prepare, but it also allows for creativity with various toppings and crust options. You can customize it to suit your taste or the preferences of your guests. Plus, the fact that it requires no baking makes it a perfect dessert for warm days or busy schedules.
As you enjoy this delicious dessert, remember that the joy of cooking and sharing food is what truly makes it special. So, gather your ingredients, follow the steps, and create your own homemade no-bake Twix cheesecake. Your taste buds will thank you!
Happy baking, or rather, happy no-baking!